Digital TV converter box and Antenna

Steps
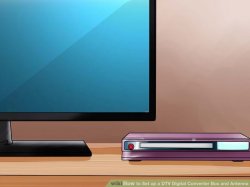
- Set the converter field beside the tv in an unobstructed location. The converter package needs to be near the tv because will likely be attached to your television with an included cable (or cables). The converter box is likewise managed by an included handy remote control, so that it ought not to be behind an object that block the handheld remote control sign. Furthermore, the converter box should be connected in, so should be near a power socket or power strip.
- See the labeled connections in the straight back for the converter field which means you understand where you can link the TV and antenna.
- Switch off your television and just about every other attached devices. If utilizing a power strip, also change it off.
- Connect the converter package to an antenna with an RF coaxial cable. For those who have an adult antenna that will not link right to an RF coaxial connector, begin to see the area for older TVs at the bottom associated with the procedures section. Any free-standing antenna can be used, however it is recommended that an antenna this is certainly designed to collect DTV indicators be utilized for ideal reception. Cheap rabbit ears and more powerful wall-mounted and outdoor antennas can easily be bought.
- When using a normal rabbit-ear design antenna, set the antenna near the television. Link one end of an RF (coaxial) cable to your ANTENNA RF IN connector on converter package. Connect another end regarding the cable to the TO TV connector in the antenna. It could be far more convenient for connecting the RF coaxial cable into antenna first, or even the RF coaxial cable may already link to the antenna if it had been previously linked directly to the TV. The antenna might also have a CABLE IN connector that seems just like the TO television connector. Be sure to not ever connect the television to this connector. If the antenna is powered, plug within the included power adapter, but keep the antenna off until all the other elements are connected.
- If using an additional or else mounted antenna, assemble it and connect it to a protected object. If antenna is exterior, the RF coaxial cable that connects the antenna towards television will have to pass through your house, frequently via a hole that has been drilled in wall surface. Connect the RF coaxial cable on antenna, and connect the other end of this cable towards ANTENNA RF IN connector in the converter box.
 If antenna is powered, a segment of cable which was included with the antenna will probably need to be put in between your converter package plus the antenna over the exact same RF coaxial cable that links the converter box to the antenna. This section of cable are going to be connected directly to the converter field ANTENNA RF IN connector, as well as the RF coaxial cable that operates to the external antenna are connected to the various other end associated with the driven section. The driven section must be plugged into an electrical adapter that is plugged into a wall plug.
- Connect the converter field towards television. Depending on the provided cables, the design of the converter field, together with design of the television, there may be other ways to get in touch the converter field to your television. Most converter cardboard boxes have a connector for an RF coaxial cable and contacts for composite cables. If you have a mature TV that'll not connect right to an RF coaxial cable or composite cables, start to see the area for older TVs at the end associated with methods section. Composite cables include one yellow video clip cable as well as 2 audio cables. The audio cable for the right presenter is red while the cable to the left speaker is white.
- The most typical way is to link the converter package plus the television with an RF (coaxial) cable. This kind of cable should be given the converter box. Just connect one end for the RF coaxial cable into the TV RF away connector from the converter box, then connect another end for the RF cable to your comparable cable connector that's regarding tv. This connector on the television should be labeled as VHF/UHF.
- As a substitute, the converter may also be attached to the tv with one composite movie cable as well as 2 sound cables in place of with the solitary RF coaxial cable if these connections exist on your own tv (the converter package must link to an antenna with an RF coaxial cable). This program is particularly useful in the event that you should be hooking up a different audio system or self-powered stereo speakers, as the video and also the sound are passed through separate cables. The composite video clip cable connectors regarding converter field and on the television will likely to be yellowish, whilst the composite sound connectors will likely to be purple and white.
 The purple cable is actually for suitable speaker, together with white cable is for the LEFT speaker. Connect the sound and video cable into converter field. After that connect the yellow-tipped video clip cable towards the yellow VIDEO IN connector regarding the television. Next, link the red-tipped sound cable into red AUDIO IN RIGHT connector on the television, and link the white-tipped audio cable towards SOUND IN LEFT connector regarding television.
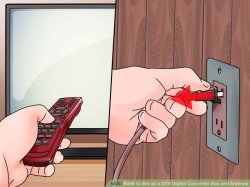
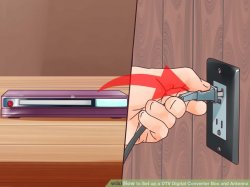
- Connect into the converter box. The converter field might added to an electric adapter or may have a permanent, standard cord. If it has an electric adapter, just plug the adapter into a wall plug or energy strip and connect the power adapter in to the converter box. If utilizing an electrical strip, plug the converter field into a powered-off energy strip, then turn on the energy strip.
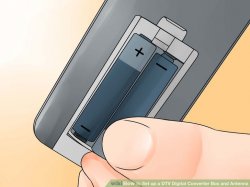
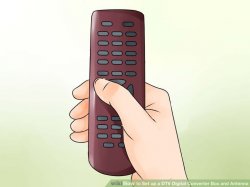
- Added batteries in the converter box remote control. Batteries for the radio control might included with the converter box.
- Familiarize yourself with the handy remote control. It manages numerous TV and converter field functions. If remote included is a universal programmable remote, it is in a position to control all TV functions after it's been manually set to achieve this.
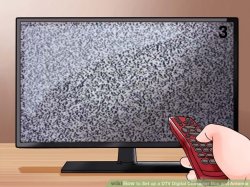
- Switch on it and set it to channel 3 or 4. It is not finished with the converter package remote, however with the television remote or by operating the television by hand (unless the remote can be set to be utilized designed for the television). The converter box is only going to show photos on the TV whenever television is defined to 1 of the channels. The converter package must also be set-to channel a few, whichever corresponds utilizing the channel the TV is defined to. This may be done by hand in the shape of a switch in the converter field, or utilising the on-screen converter field selection (see next move).
- Power on converter box utilizing the converter box remote control or by pushing the ability switch from the converter field product.
- If converter package may be set to channel 3 or 4 utilising the on-screen selection, set it towards the desired station if necessary.
 10
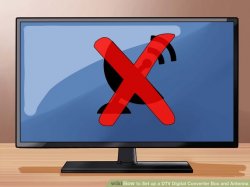
Scan for channels. Enter the on-screen menu and allow the converter field to instantly scan for stations. Automatic checking will see offered networks and exclude others. If you don’t accept many networks, you may need a much better antenna or it may be essential to spot your antenna in an unusual area.
10
Scan for channels. Enter the on-screen menu and allow the converter field to instantly scan for stations. Automatic checking will see offered networks and exclude others. If you don’t accept many networks, you may need a much better antenna or it may be essential to spot your antenna in an unusual area.
- Once you know that certain networks is obtained but aren't obtained immediately through the automatic channel scan, you could add all of them utilizing the on-screen menu, and adjust the antenna until they are obtained.
- An additional channel scan can also be performed utilizing the on-screen selection at any time to search for and include channels that have been perhaps not found through the initial channel scan.
- Channels that are received and were added to the channel list but are not desired can be removed using the on-screen menu using the channel edit (or similar) function.
-
11
Check out the reception and signal strength. Bad reception utilizing the converter package will look "pixelated" or "blocky". The antenna may need to be adjusted or place in a unique area. Bad reception may also present as a "NO SIGNAL" or "NO PROGRAMMING" message on the television screen, but this may also indicate that there is no channel to receive whatsoever. To test sign energy for a certain channel in real time, make use of the "alert power" or similar alternative with the radio control. Adjust the antenna when using the sign energy substitute for see just what antenna arrangement or location offers the most readily useful image. If making use of an antenna that's mounted from the TV, such as a rooftop antenna, someone can monitor the alert power signal on the TV, whilst other techniques or changes the antenna.
- 12
Set the desired picture "aspect ratio" format. The converter package may in the beginning show the television photos in aspect proportion formats which are made for widescreen HDTVs. You will have numerous different image sizes or aspect ratios seen on the TV according to the channel and/or the precise program, together with aspect proportion are adjusted via the converter package menu to higher fit standard 4:3 analog TV displays.
- Reveals that tend to be shown in widescreen structure can fill the display screen from the left and right edges for the television, but not at the top and bottom regarding the television display screen. Despite the fact that some of the top and bottom of television screen just isn't used, this can be an appealing format because more of the original filmed picture is visible on the display.
- To display shows in widescreen format (that fills the display screen on remaining and correct edges), choose "letterbox" or even the comparable aspect proportion choice. The "auto" choice could also achieve similar result.
- Some programs will likely be shown in a 4:3 structure that completely fill it display. Programs shown in this structure should entirely fill the television display screen regardless of aspect ratio format which has been plumped for.
- Some shows will simply fill the midst of the display (you will have unused regions of it display in the remaining and correct sides plus the top and base). Such programs could be in a shrunken 4:3 format or in a shrunken widescreen format. These shows will have to be cropped to correctly fill the display screen.
- To make sure that the image will fill the television screen reasonably really for several networks, adjust the aspect ratio to "cropped" making use of the on-screen menu.
- Reveals that tend to be shown in widescreen structure can fill the display screen from the left and right edges for the television, but not at the top and bottom regarding the television display screen. Despite the fact that some of the top and bottom of television screen just isn't used, this can be an appealing format because more of the original filmed picture is visible on the display.
-
13
Community Q&A
Ask a concern
If this question (or the same one) is answered two times in this part, kindly click to allow us know.
|
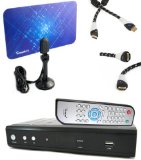
Viewtv AT-163 ATSC Digital TV Converter Box Bundle with ViewTV Flat HD Digital Indoor TV Antenna and ViewTV HDMI Cable w/ Recording PVR Function / HDMI Out / Coaxial Out / Composite Out / USB Input CE (Viewtv)
|
|
Digital Converter Box + Digital Antenna + RCA Cable - Complete Bundle to View and Record HD Channels For FREE Instant or Scheduled Recording, 1080P HDTV, and HDMI Output Home Theater (eXuby®)
|
|
iView HDTV 3500STB DTV Converter Box BUNDLE + Flat Digital Indoor Tv Antenna + Aurum HDMI cable and Remote control Home Theater (iView)
|
|
Digital Converter Box + Flat Antenna + HDMI Cable for Recording & Viewing Full HD Digital Channels for FREE (Instant & Scheduled Recording, DVR, 1080P, HDMI Output, 7 Day Program Guide & LCD Screen) Home Theater (eXuby®)
|

I don't have cable or satellite, we hooked outdoor antenna up and have had great reception but not now, WHY!!? | Yahoo Answers
ever since television stations went digital we have had our televisions hooked up to an outdoor antenna and have gotten great reception until about two weeks ago now we have no signal, why has this happened and can we do anything to correct it???
Check the cable. You may have had a hungry rat or squirrel chewing on your wires. If that doesn't reveal any problem, plug the antenna input into a different TV and see if that works. If so, it's your TV. If not, it's the antenna or cable. If the first two fixes don't work, try running a second cable from the antenna to the TV to completely bypass the original cable. Finally, verify that the antenna is positioned properly and didn't get blown off line or something.